


Women Are Swapping Their Boring Water For This Ice Pop Electrolyte Mix!
What’s sadder than discovering your favorite necklace, bracelet, or pair of earrings is broken? Realizing someone out there knows how to fix broken jewelry, that it probably isn’t that difficult, but you have zero idea where to start.
Well, every acquired skill starts at a place where you aren’t sure how the heck to proceed, and fixing broken jewelry is no different. Whether your bolo necklace has a broken clasp, your chain bracelet has come unraveled at the chain, or you can’t seem to maneuver a loose bead back into position, there’s usually a not-so-difficult and surprisingly affordable solution to your broken jewelry problems. Before you chuck out your prettiest accessories, try these fast fixes and get a handle on broken jewelry so that you can keep wearing your necklaces, bracelets, and earrings.
1) Repair A Broken Necklace Clasp
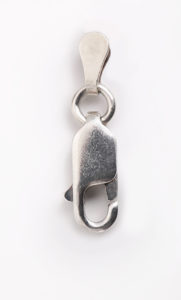
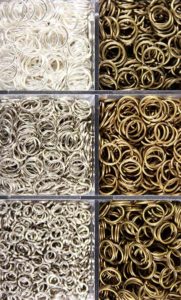
Necklace clasps are notoriously fickle and can easily break. Hit up a craft shop and arm yourself with jewelry pliers and a lobster clasp. Now here comes the fun part. The first order of business is removing the old clasp — open the jump ring that’s attached to the broken lobster clasp. Position two sets of pliers on either side of the ring and twist your hands in opposite directions until the old clasp loosens and comes undone. Now attach the new lobster clasp onto the open jump ring. Re-attach both pliers on opposite ends of the jump ring and tighten it until it’s closed.
2) Mend Hook-Style Earring Wires
If the wire hook on your chandelier or teardrop earrings has broken, use your pliers to open the loop at the bottom, swap a broken hook for a new hook (make sure you get the right size), and then rely on your pliers again to tighten the bottom loop so that it’s secure.
3) Restring A Broken Beaded Necklace
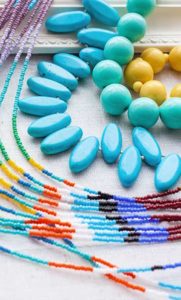
Got a beautiful beaded necklace that needs a fix? Depending on the condition of your necklace, it might be worth your while to remove all of the beads and actually change the string. Use pliers when necessary to open any loops that contain beads so that you can free them from the necklace. This is also a great time to clean each bead so that it looks amazing when it’s back on your new necklace. Now, slide each individual bead onto the cord gently so that you don’t put unneeded stress on the cord. When you’re happy with your bead pattern and the number of beads attached to the cord, add your last bead: a seed, crimp, or bead tip. Finally, tie a knot at the end of your cord (it may be helpful to use a needle) and use a bit of craft glue to keep it in place. Snip off any extra cord that is dangling and slip on a clasp, which you’ll need to close using your pliers. To make sure the clasp is in place, simply wiggle it a bit and tighten it more if necessary. You’re almost there — the only thing left to do is repeat the procedure on the other side of your cord. And, voila, you have a bead necklace that’s as good as new.